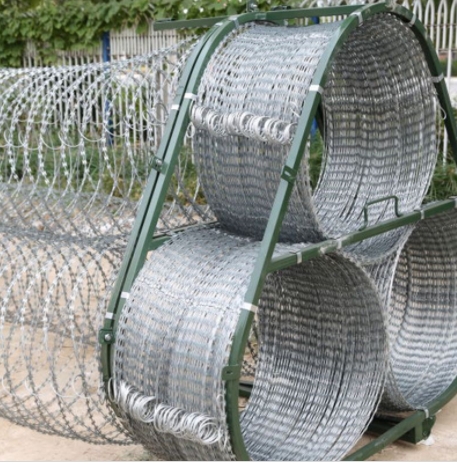
How to Install Welded Razor Wire Mesh?
Installing Welded Razor Wire Mesh can be a crucial step in ensuring the security of your property. Whether it's for a high-security facility or a residential property, proper installation is essential for its effectiveness. In this article, we will provide you with a comprehensive step-by-step guide on how to install Welded Razor Wire Mesh. From preparing the site to securing the mesh, we'll cover all the necessary aspects to help you successfully complete the installation process.
Section 1: Preparing the Site
Before installing Welded Razor Wire Mesh, it's important to prepare the site properly. This section will guide you through the necessary steps to ensure a smooth installation process.
1.1 Checking the Perimeter:
Inspect the perimeter to identify any existing obstacles or potential issues.
Clear the area of debris, vegetation, or any obstructions that may hinder installation.
1.2 Marking the Installation Path:
Determine the desired height and location for the razor wire mesh.
Use markers or chalk to indicate the installation path along the perimeter.
Section 2: Installing the Posts
The installation of sturdy and secure posts is vital for the proper installation of Welded Razor Wire Mesh. This section will explain the process of installing the posts correctly.
2.1 Digging the Post Holes:
Dig holes at regular intervals along the marked installation path.
Ensure the depth and diameter of the holes are appropriate for the posts.
2.2 Setting the Posts:
Insert the posts into the holes and ensure they are aligned properly.
Use concrete or gravel to secure the posts and allow them to set.
Section 3: Attaching the Razor Wire Mesh
Once the posts are securely installed, it's time to attach the Welded Razor Wire Mesh. This section will guide you through the process of attaching the mesh effectively.
3.1 Unrolling the Mesh:
Unroll the Welded Razor Wire Mesh carefully along the installation path.
Ensure the mesh is aligned with the top of the posts and stretched taut.
3.2 Securing the Mesh:
Use strong and durable clips or brackets to fasten the mesh to the posts.
Ensure the mesh is evenly spaced and properly tensioned.
Section 4: Adding Extra Security Measures
To enhance the security provided by the Welded Razor Wire Mesh, additional measures can be implemented. This section will discuss some options you can consider.
4.1 Concertina Wire:
Install concertina wire coils on top of the Welded Razor Wire Mesh for added security.
Ensure proper tensioning and attachment of the concertina wire.
4.2 Warning Signs:
Place warning signs at regular intervals to alert people of the presence of razor wire.
Ensure the signs are visible and comply with local regulations.
Conclusion:
Installing Welded Razor Wire Mesh requires careful planning and execution to achieve optimal security. By following this step-by-step guide, you can successfully install the mesh and enhance the protection of your property. Remember to prioritize safety during the installation process and consult professionals if needed. With the proper installation, Welded Razor Wire Mesh can be an effective deterrent against unauthorized access and provide you with peace of mind.


